Inbox
When visitors fill in the contact form on your site or request an appointment, their messages land in the Inbox. Here you read them, reply and archive them. Your replies go to the visitor by email; if the visitor replies to that email, the answer comes straight to your own email address.
Where messages come from
If you've added a Contact block to your site, visitors can write to you through the form. After sending, the visitor sees Your message has been sent, and the message lands in your inbox.
The organization's owner also gets a notification email for every new message. The link in that email opens the message right in the inbox.
Appointment requests land in the same inbox.
Use the inbox
Press Inbox in the sidebar. The number of unread messages appears in the menu next to the icon.
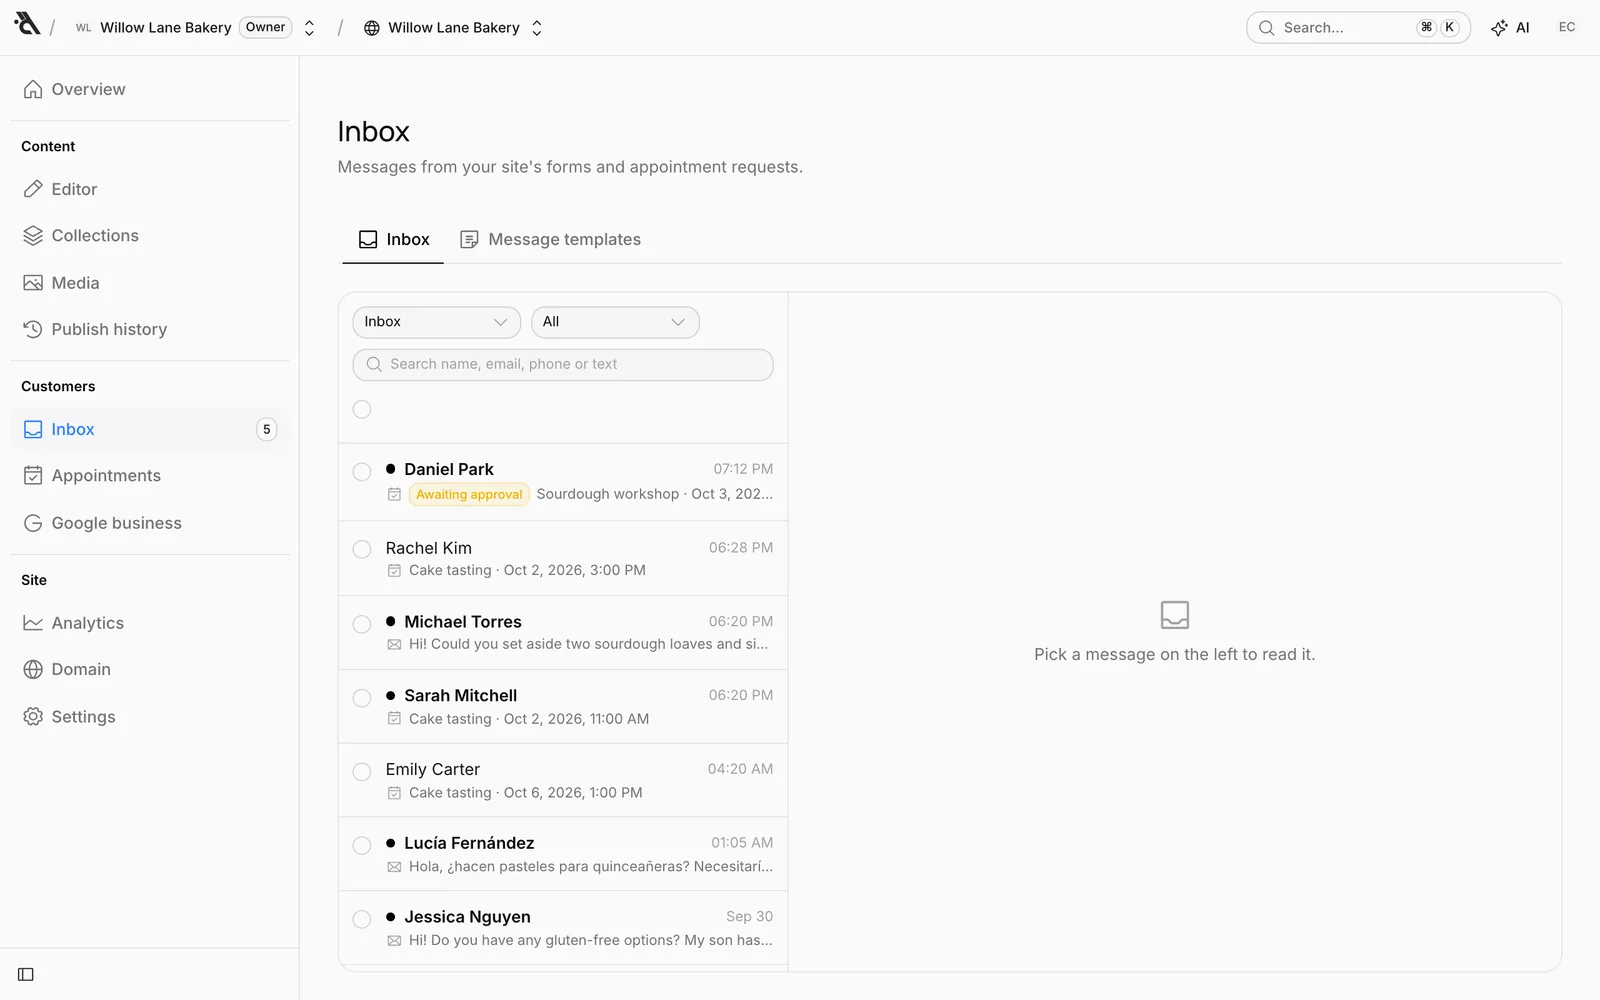
Messages are listed on the left, newest first. Unread messages have a bold name and a dot; appointment requests carry an Appointment request label. Click a message to open it on the right; it's then marked as read.
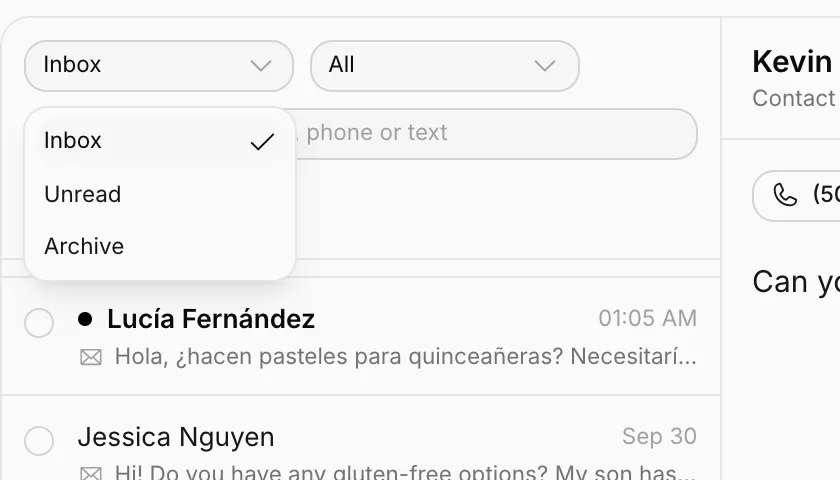
Above the list:
- Folder: Inbox, Unread or Archive.
- Type: All, Messages or Appointments.
- Search: Searches names, emails, phone numbers and message text.
The buttons in the top right of an open message let you Mark as unread or Archive it. Archived messages aren't deleted; they move to the Archive folder. Select several messages with the checkboxes in the list to mark them read, archive them or reply to them all at once.
Read and archive status is shared by the whole team: if a teammate opened a message, it shows as read for you too.
Reply
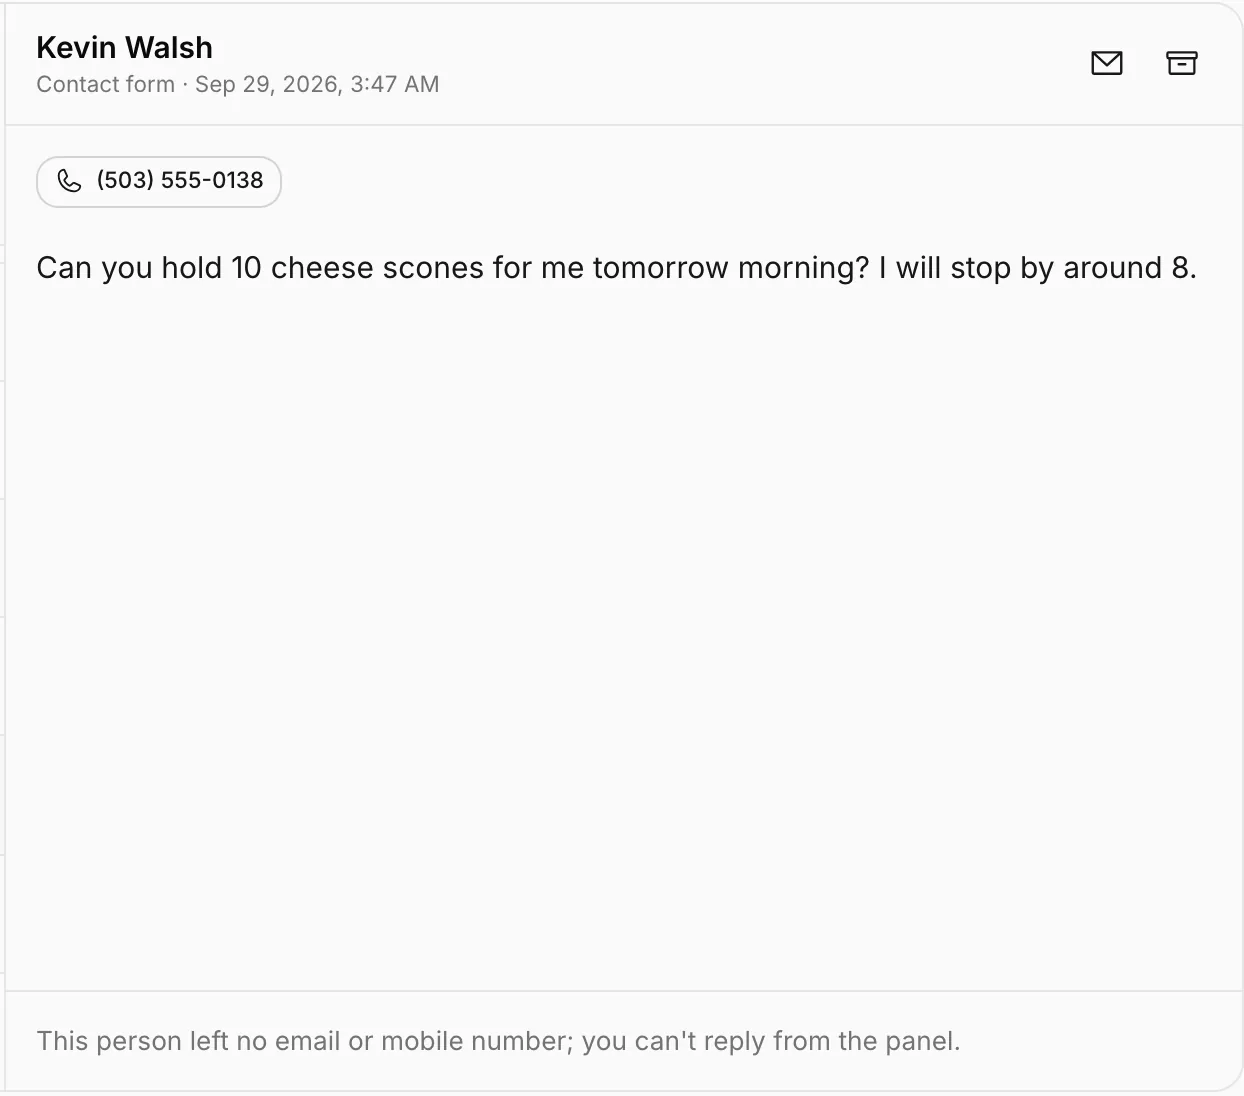
Open the message. The email address and phone number the visitor left appear at the top as buttons; use them to open your email app, call or message on WhatsApp.
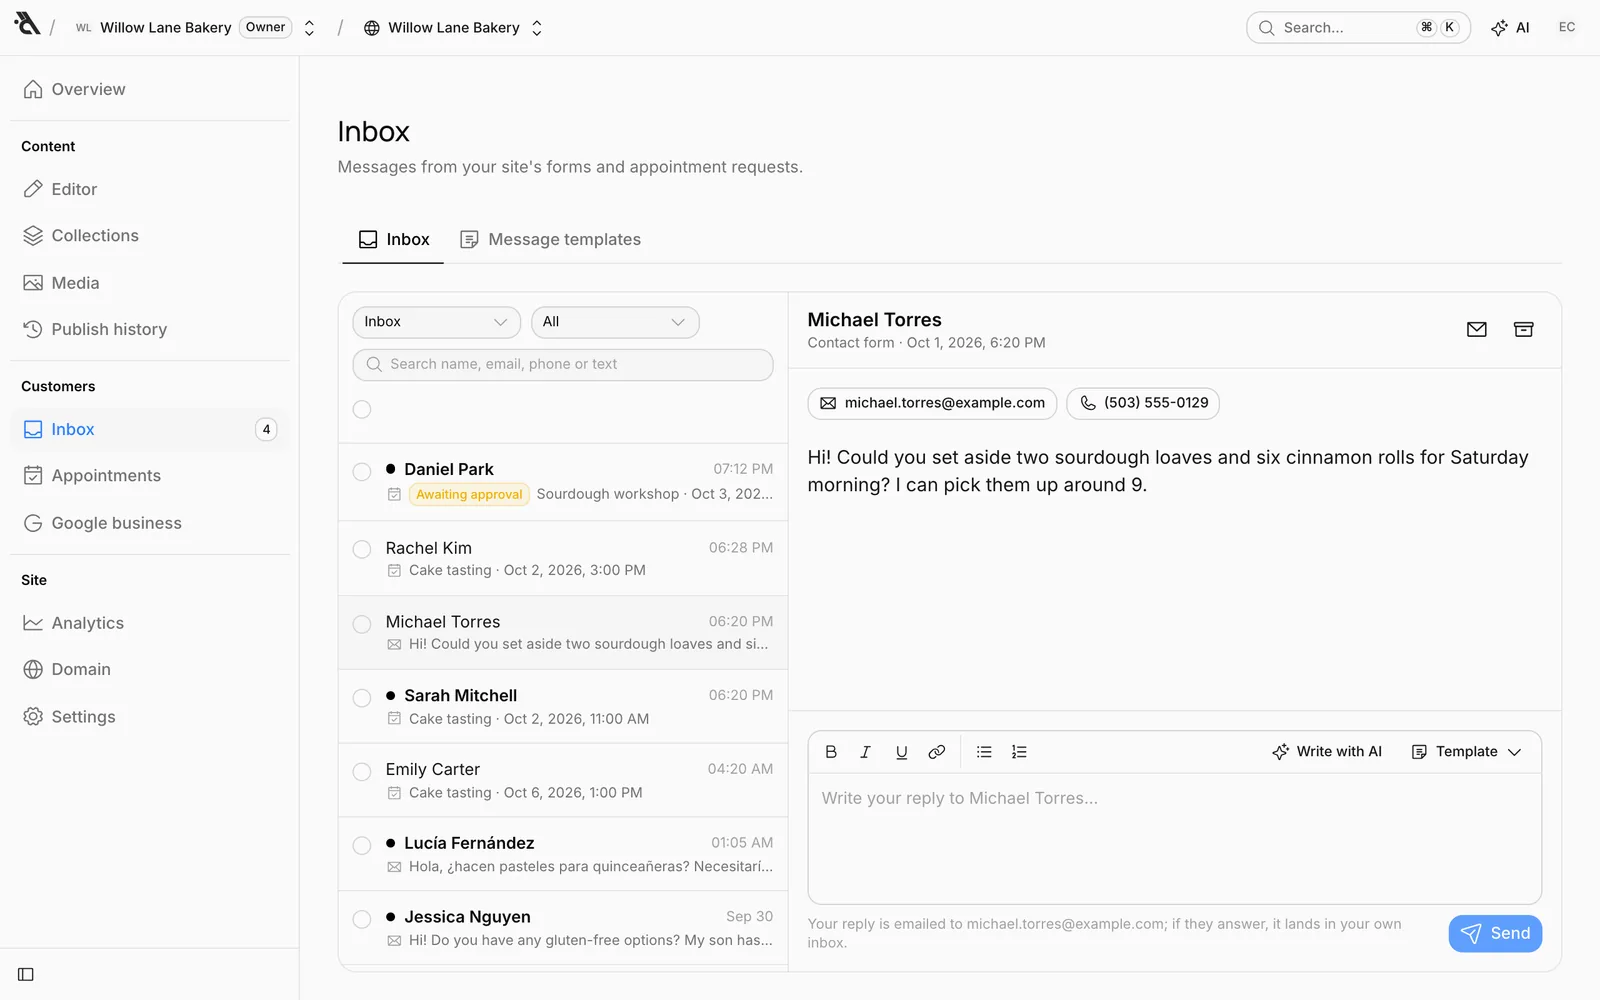
Type your reply in the box at the bottom and press Send. You can use bold, italic, underline, links and lists. The reply goes to the visitor's email address under your site's name, with the visitor's own message quoted at the bottom. If the visitor replies to it, the answer comes to your email address.
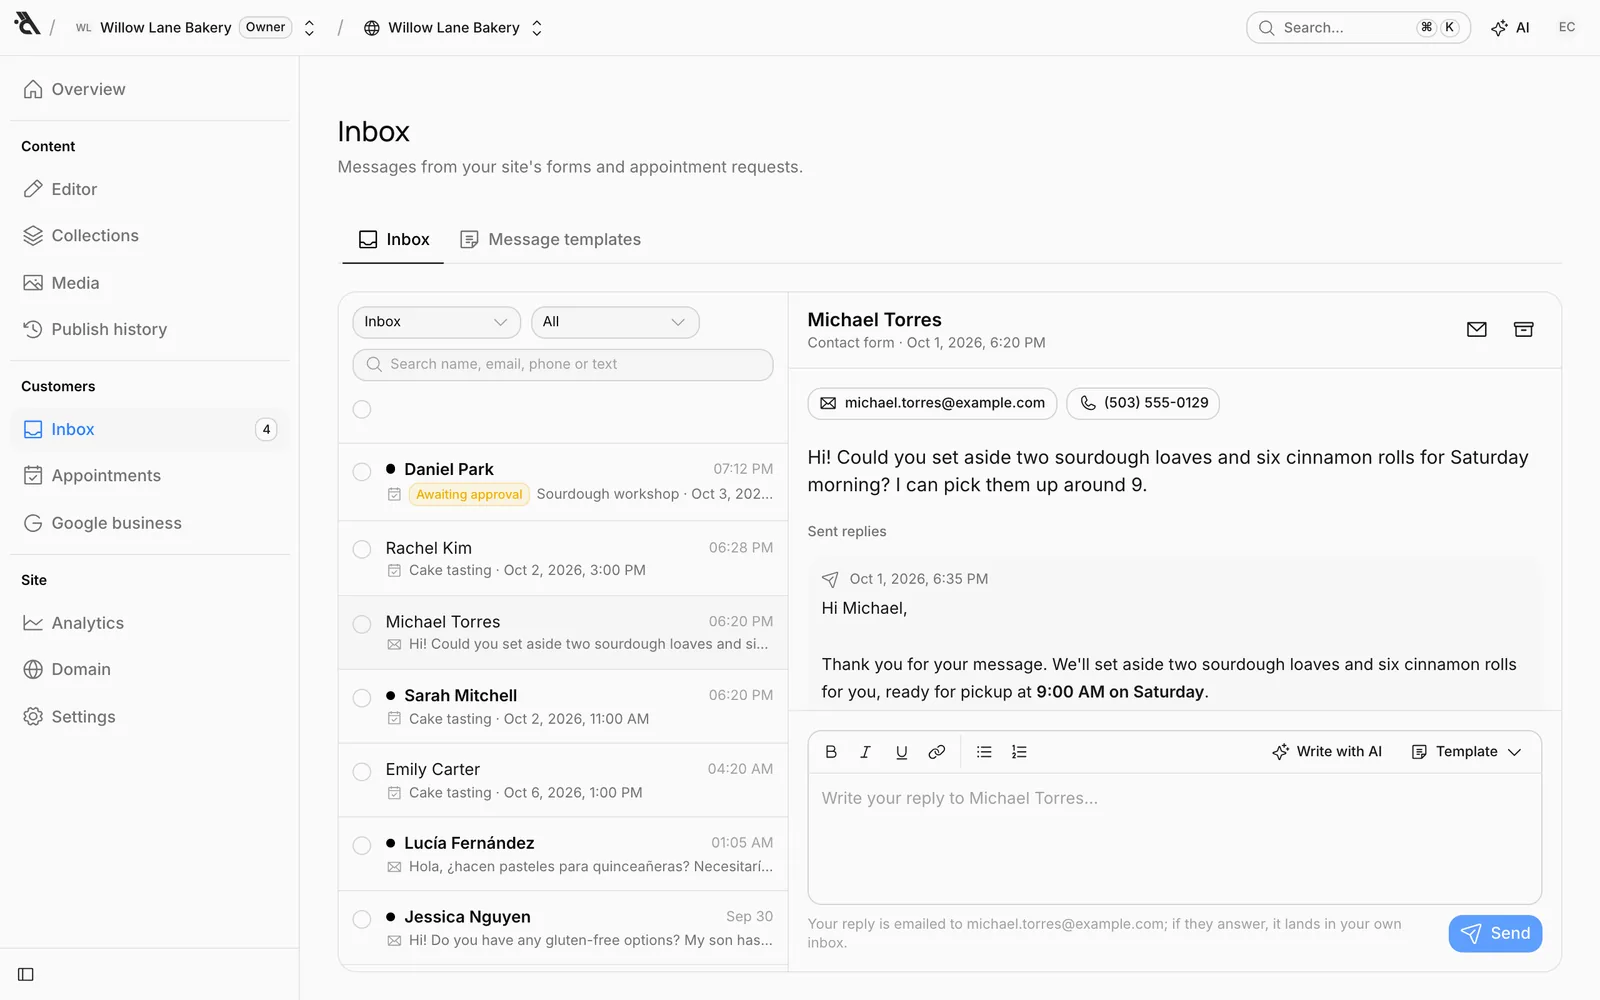
Replies you've sent are listed under the message as Sent replies, so you can see who on the team replied what.
Have the assistant write your reply
Press Write with AI in the reply box. If you like, add Instructions (such as "Thank them and say the order will be ready at 9 am on Saturday") and press Write with AI. The assistant drafts a reply based on the visitor's message, the information on your site and your templates.
When there's already text in the box, the button becomes Improve with AI: polish what you wrote with instructions like "Make it shorter and more formal". If you don't like the result, press Restore previous text.
The assistant doesn't send the reply; you read it and press Send. It doesn't make up information it doesn't know (prices, addresses…); it leaves a blank in square brackets instead ([price]). If an unfilled square bracket is left in the text, you're warned before sending.
Reply on WhatsApp
When a visitor leaves a mobile number, a Send on WhatsApp button can appear under the reply box. Pressing it opens your reply in WhatsApp, from your own account, addressed to the visitor's number; you send it from WhatsApp. Replies sent on WhatsApp don't appear in the Sent replies list.
A visitor who left only a phone number and no email can't be emailed from the dashboard.
Reply to several people
Select several messages in the list and press Reply to all. The text you write goes to each person as a separate email: each in their own language, quoting their own message. Recipients don't see each other.
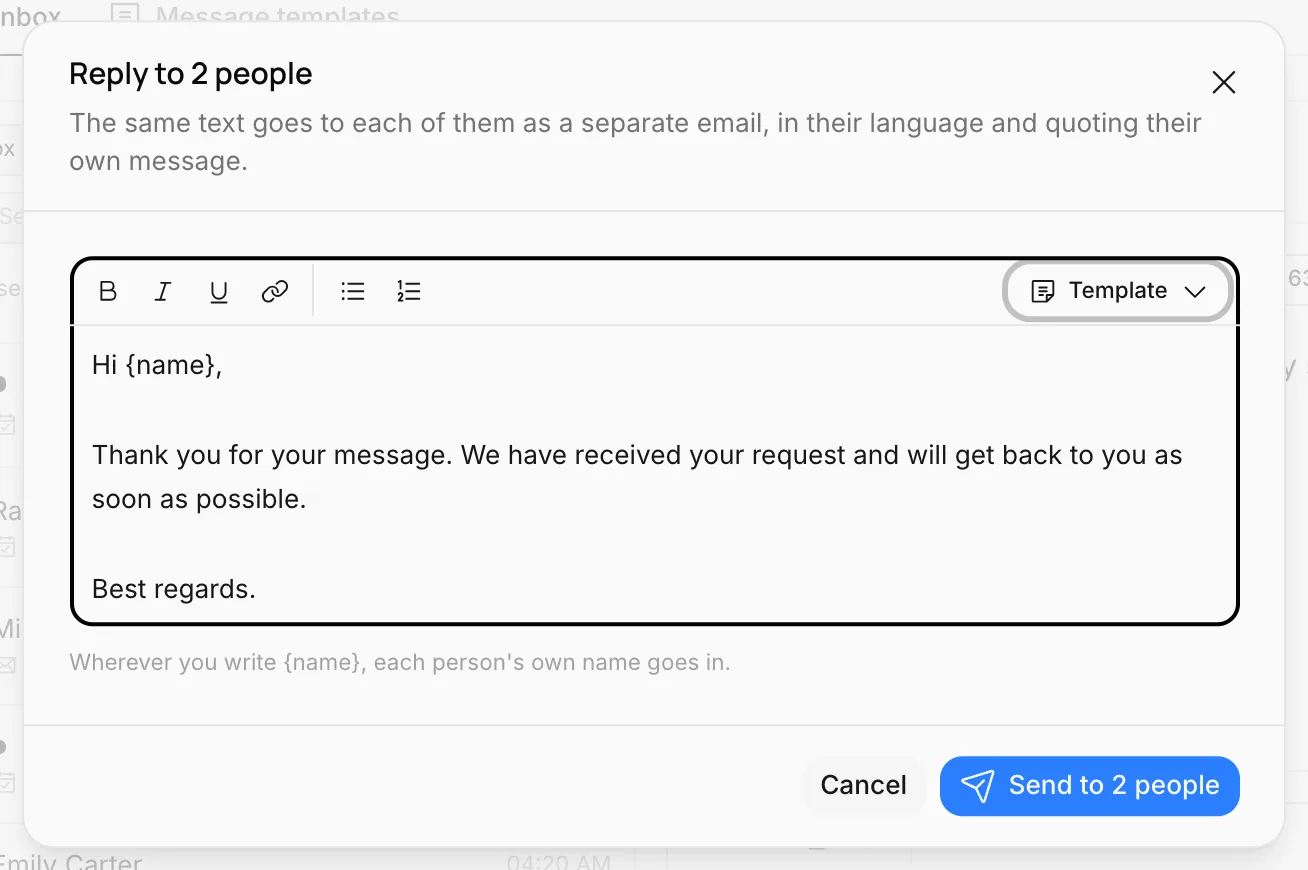
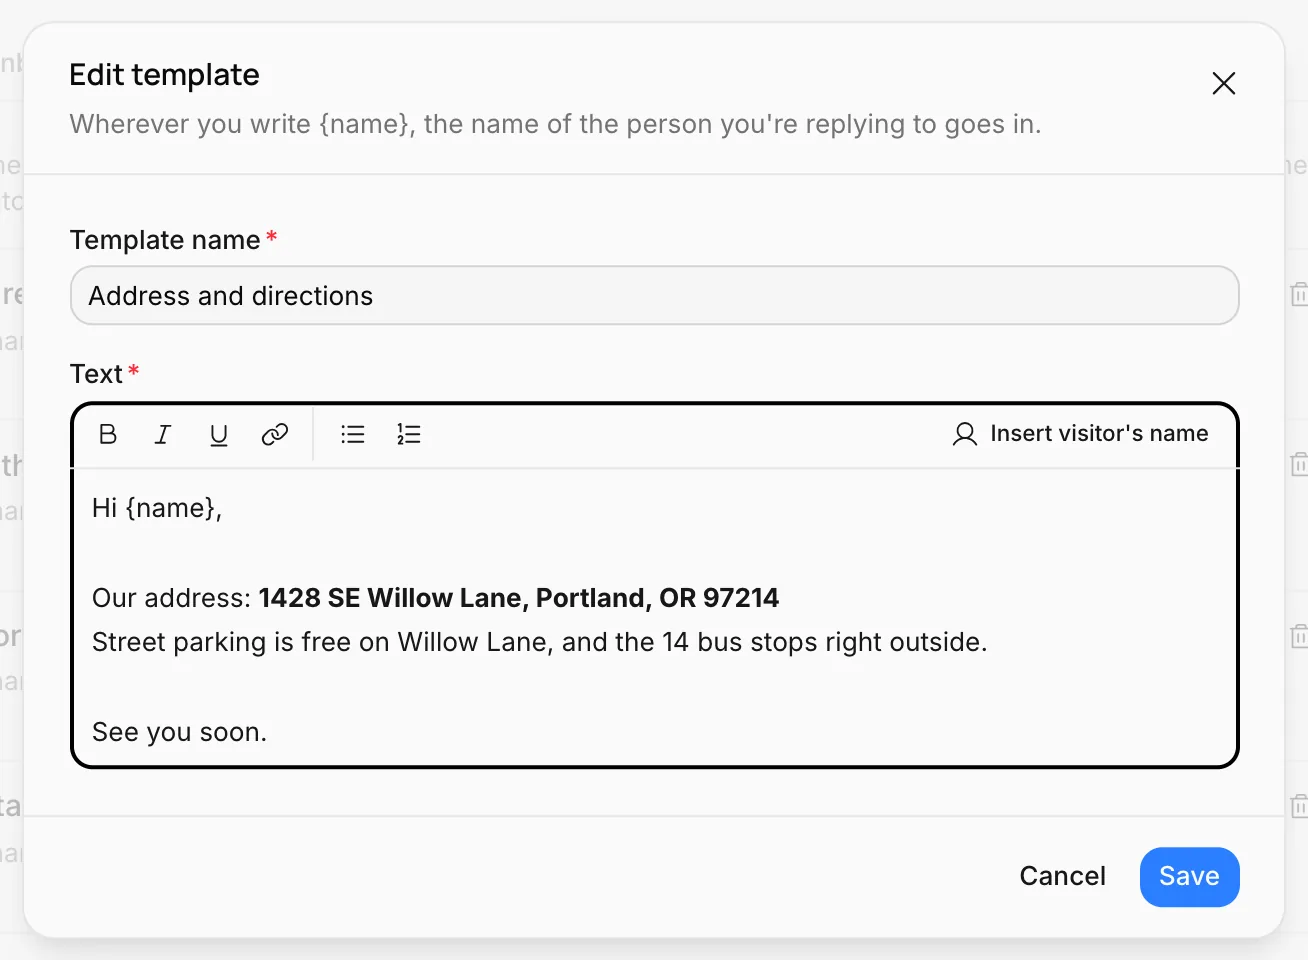
Wherever you write {name}, each person's own name goes in: "Hi {name}," becomes "Hi Jessica Nguyen," for Jessica Nguyen. People who left no email are skipped; the window tells you how many beforehand.
Message templates
Save replies you write often (thanks, prices, directions…) as templates so you don't type them every time. Switch to the Message templates tab at the top of the Inbox.
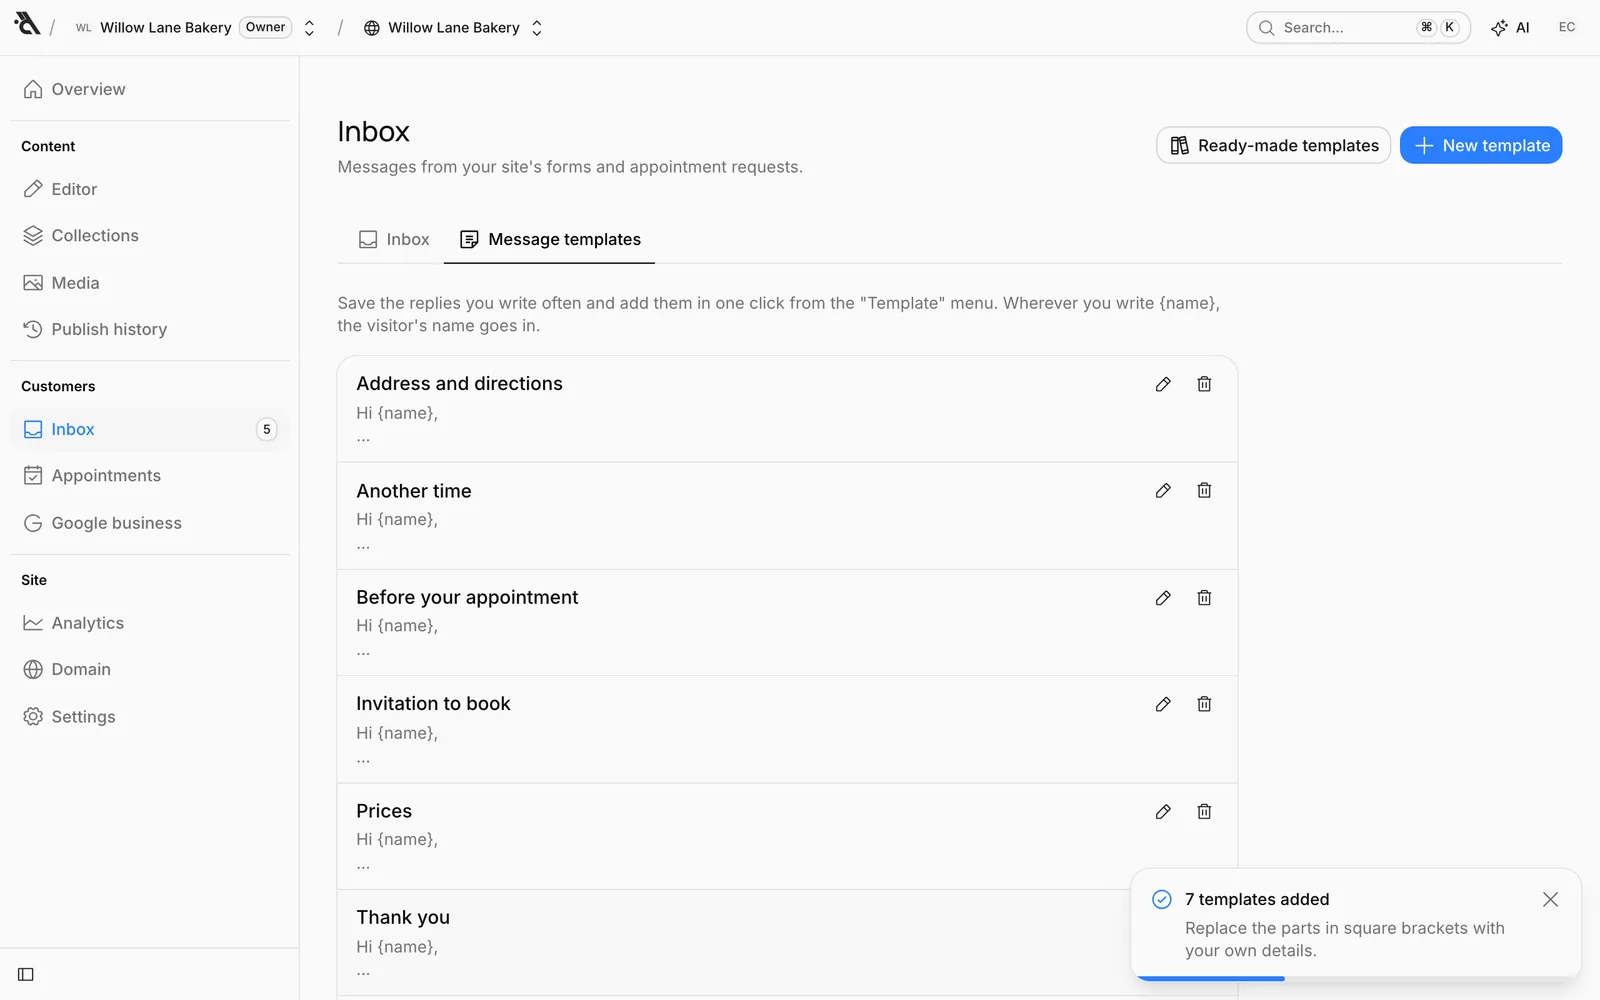
Start with ready-made templates
Press Ready-made templates. Templates for thanking, sharing prices, inviting to an appointment, directions, calling back and more are listed. Pick the ones you want and add them.
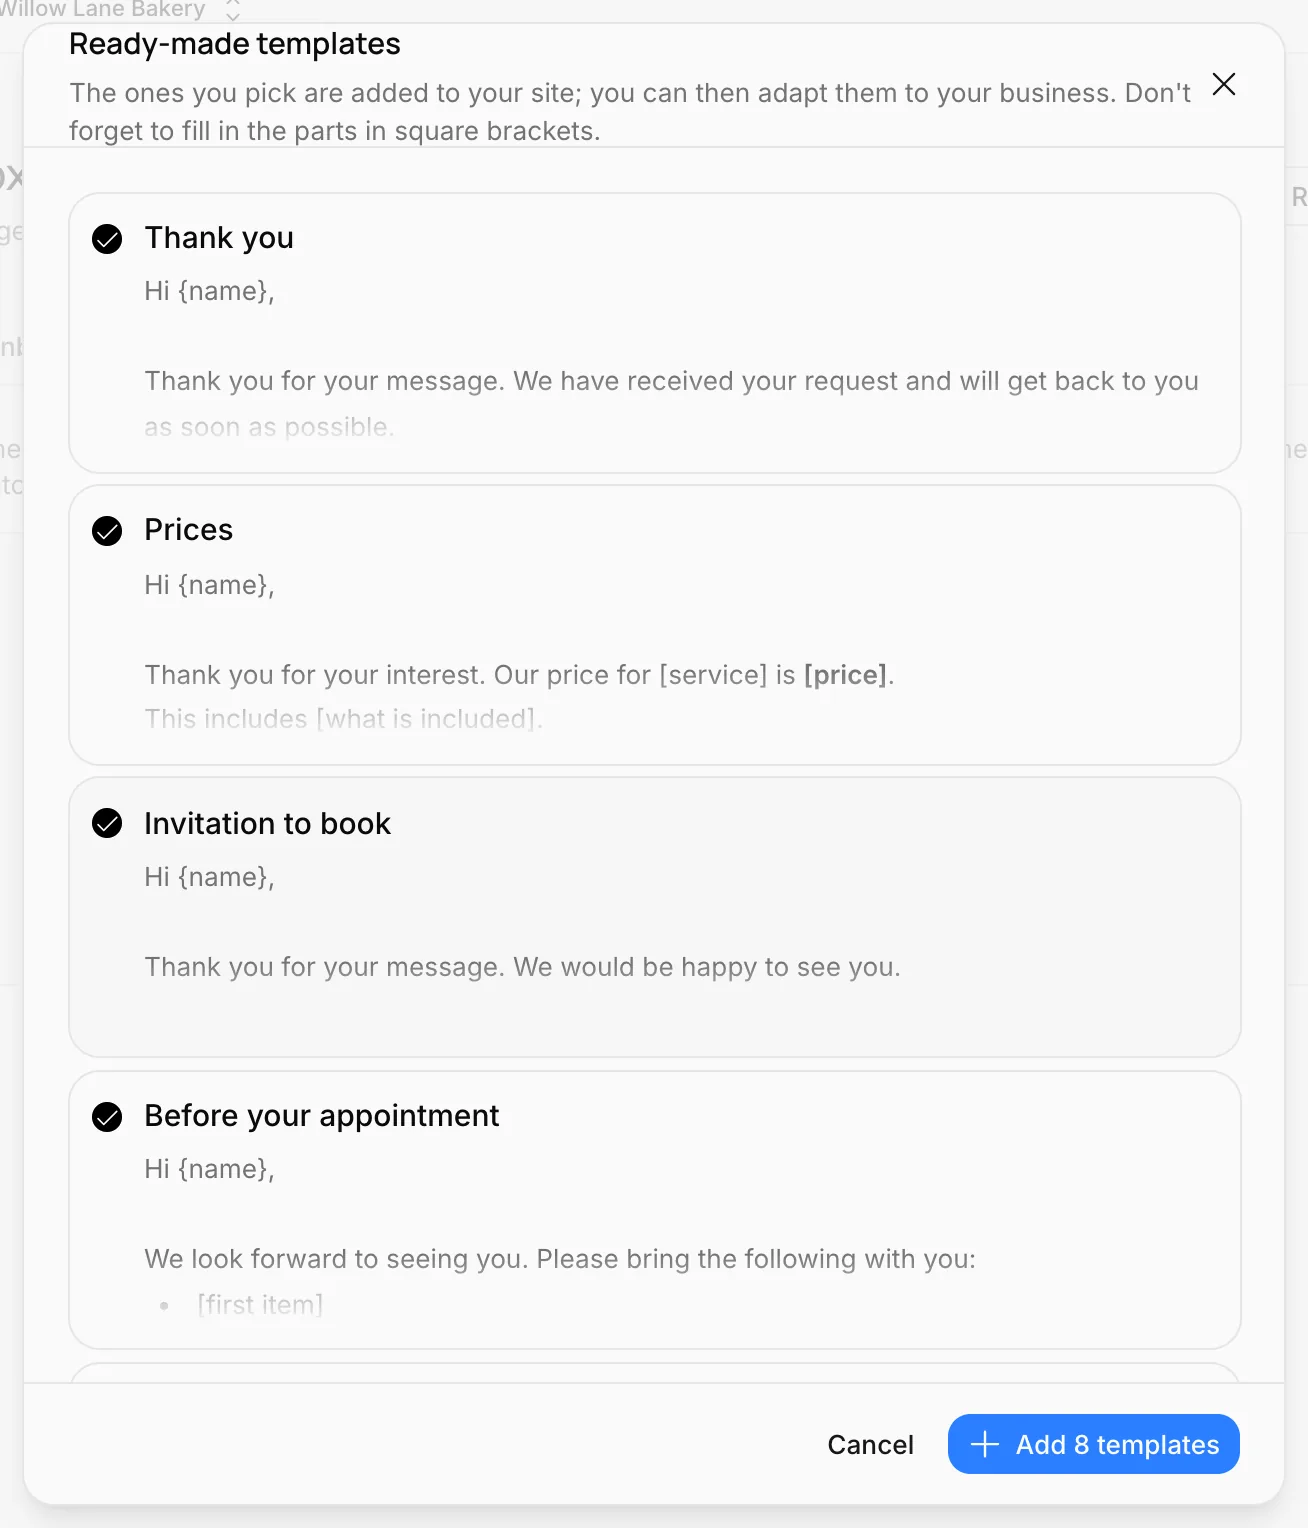
In ready-made templates, details specific to your business are left in square brackets ([price], [address]). After adding them, open each template and replace these with your own details.
Write or edit a template
Press New template or click a template's pencil icon. The Template name appears in the list and the picker; the Text is what goes to the visitor. Insert visitor's name adds {name} to the text; when replying, the visitor's name goes there.
Use a template
Open the Template menu in the reply box and find the template by its name or a word in it. If the box is empty, the template fills it; if not, it's inserted where the cursor is. {name} is filled in with the visitor's name right away.
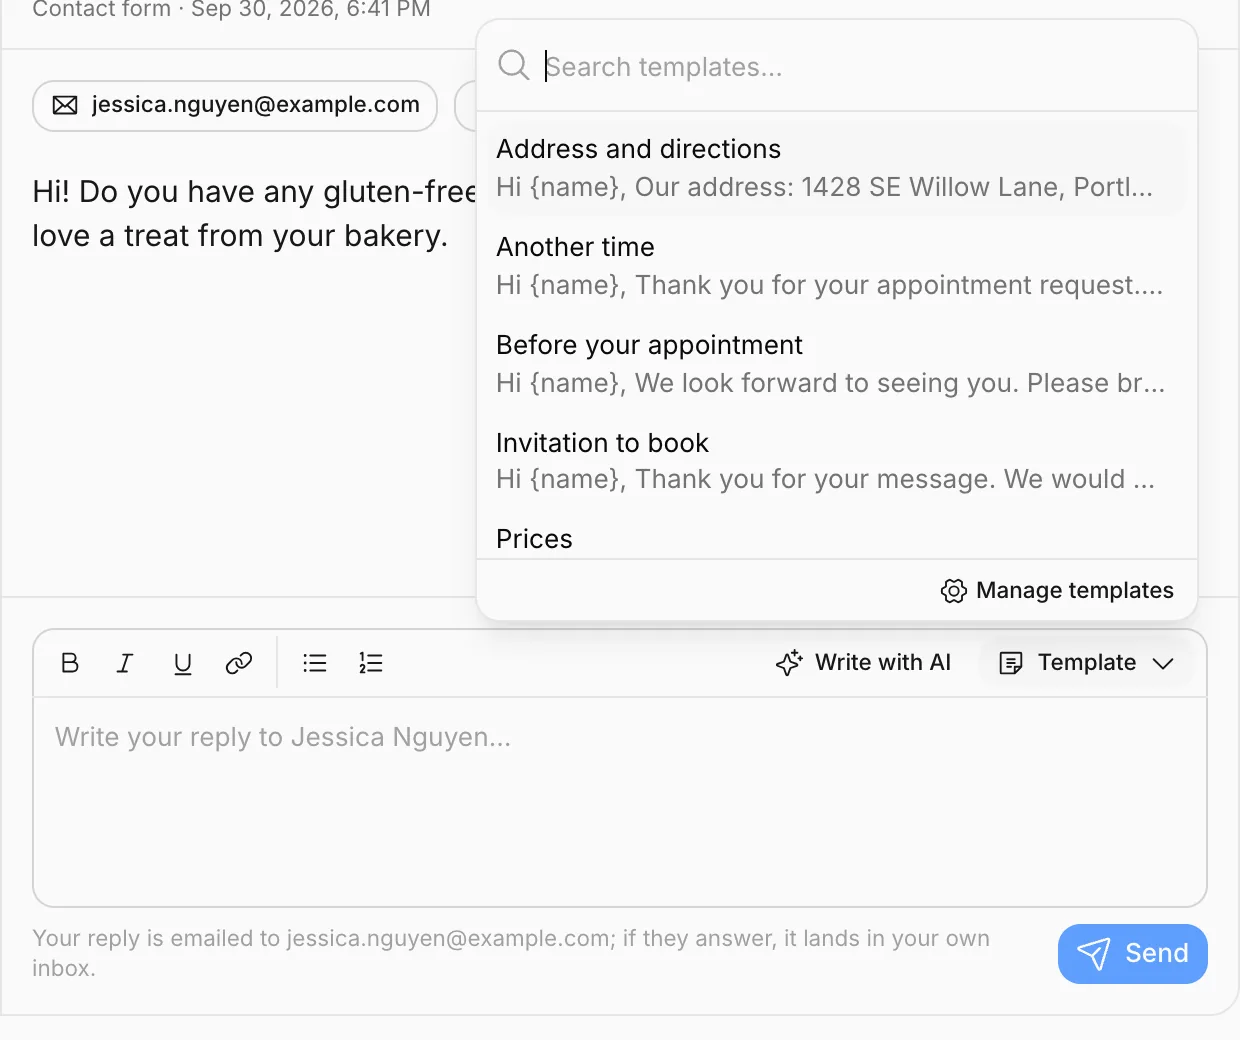
You can turn a good reply you or the assistant wrote into a template with Save as template at the bottom of the menu; the visitor's name automatically becomes {name}.
Good to know
- Messages aren't deleted; archive the ones you don't need.
- Visitors' email replies go to your own email address, not to the inbox.
- Seeing the inbox, replying and confirming appointments are separate permissions. Set your teammates' permissions on the Members and roles screen.