Appointments
With online booking, visitors pick a service, a day and a free time on your site and request an appointment. The request waits for your approval; when you confirm or decline it, the visitor gets an email. It suits any business that works by appointment: salons, clinics, workshops, tastings.
Booking takes three steps to set up: add your services, check your working hours, and add the Appointment block to your site.
The Appointments screen
Press Appointments in the sidebar. Appointments open in a full-screen calendar. If you haven't added any services yet, an Online booking is not open yet notice appears at the top.
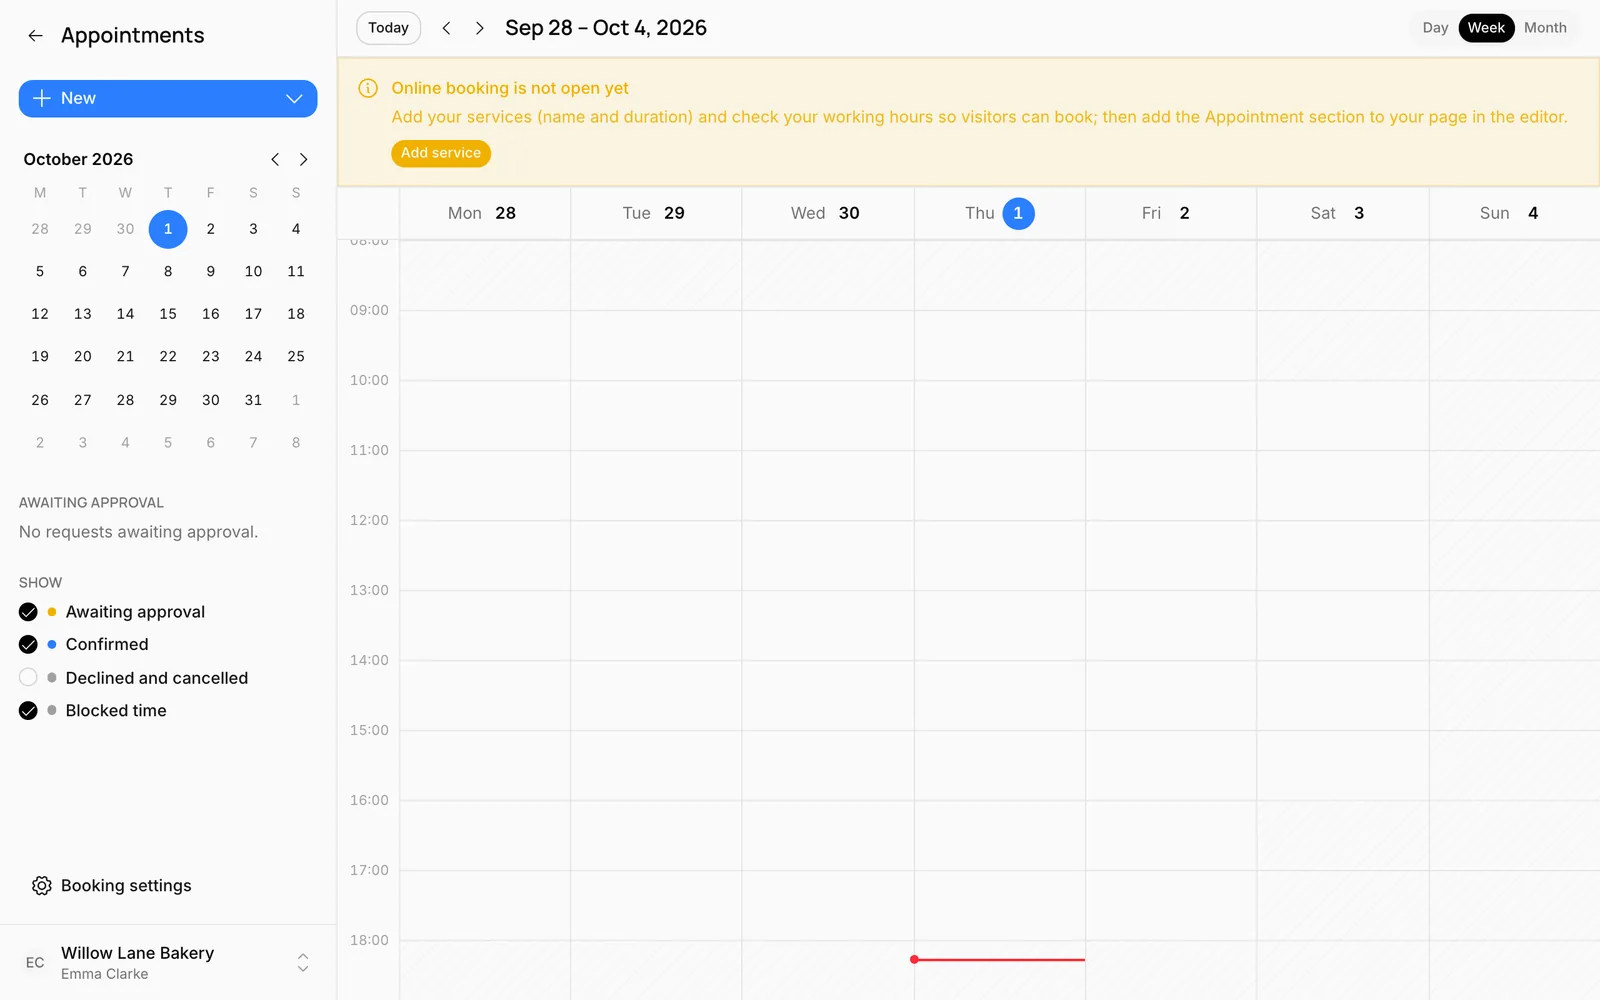
The left panel has the New button, a small calendar, the Awaiting approval list, filters for what the calendar shows and, at the bottom, Booking settings. To get back to the dashboard, press the back arrow next to the Appointments title in the top left.
Set up booking
Open Booking settings. The settings are on three tabs.
Services
The services visitors can choose. Press Add service and fill in:
- Service name: "Cake tasting", "Sourdough workshop" and so on.
- Duration (minutes): Free times are calculated from this.
- Price and Short description: Optional; visitors see them when picking the service.
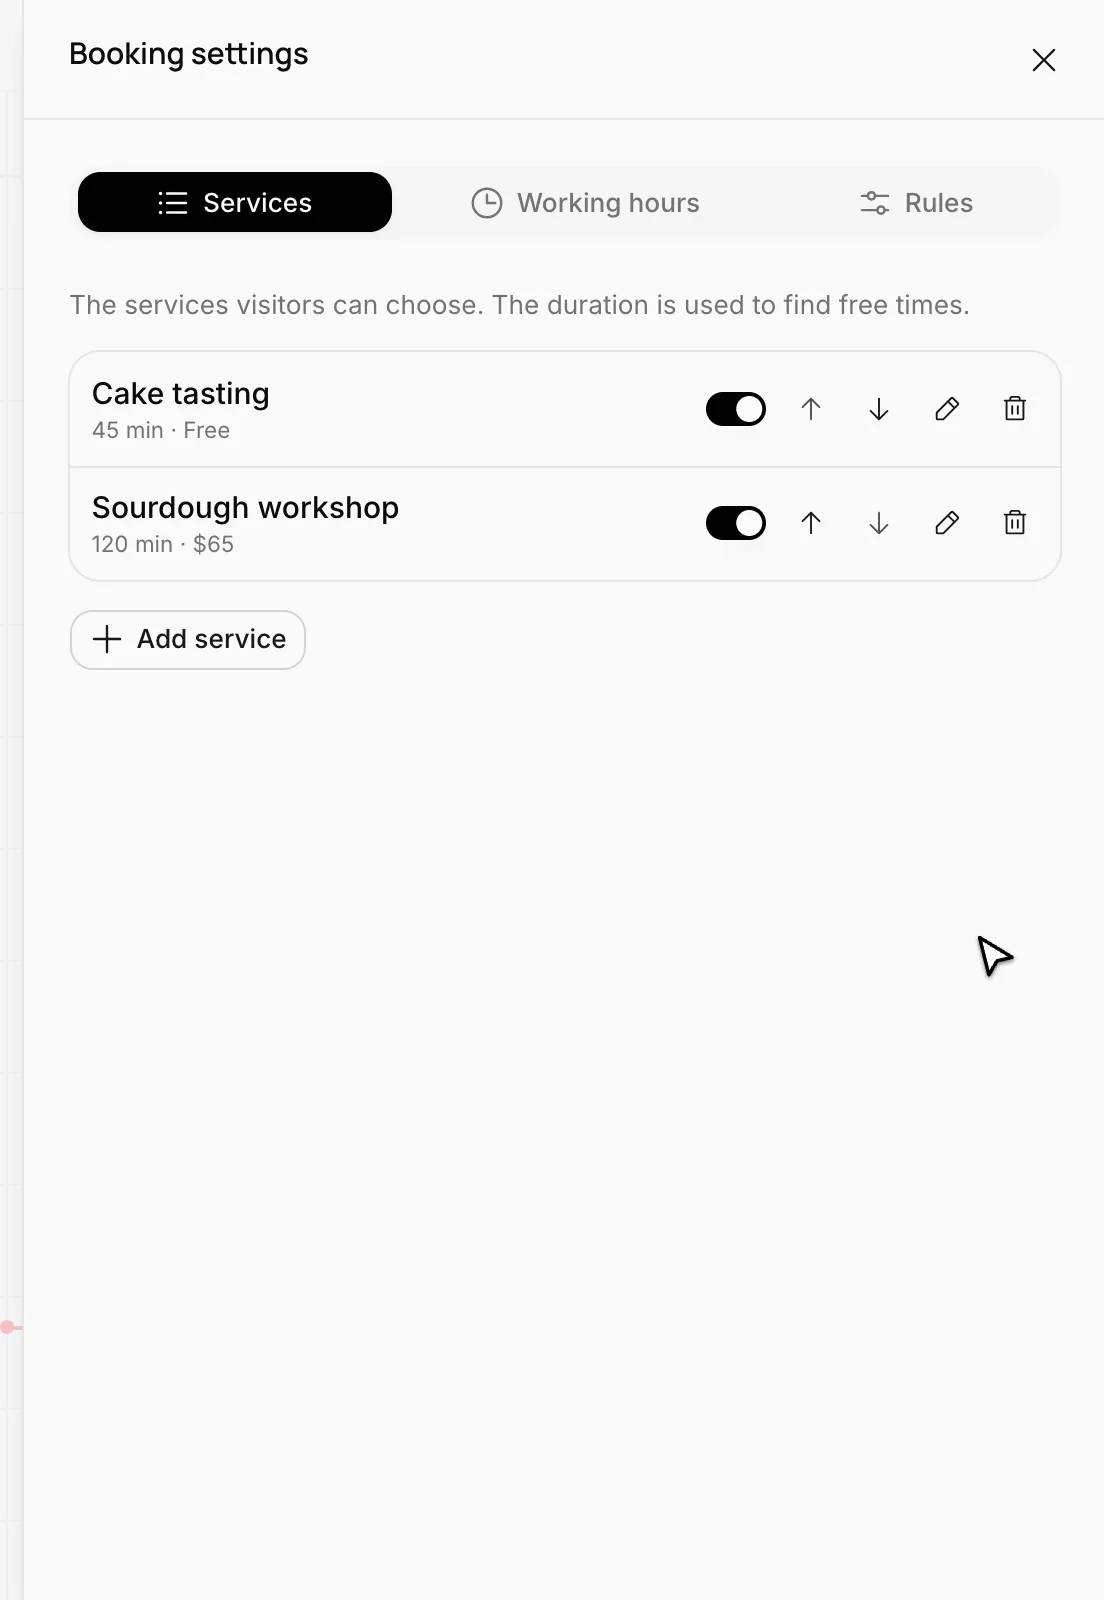
The Show on site switch hides a service temporarily without deleting it. Use the arrows to change the order of the services.
Working hours
The hours appointments can be booked, day by day. By default, weekdays 9:00–18:00 and Saturday 10:00–16:00 are open, and Sunday is closed.
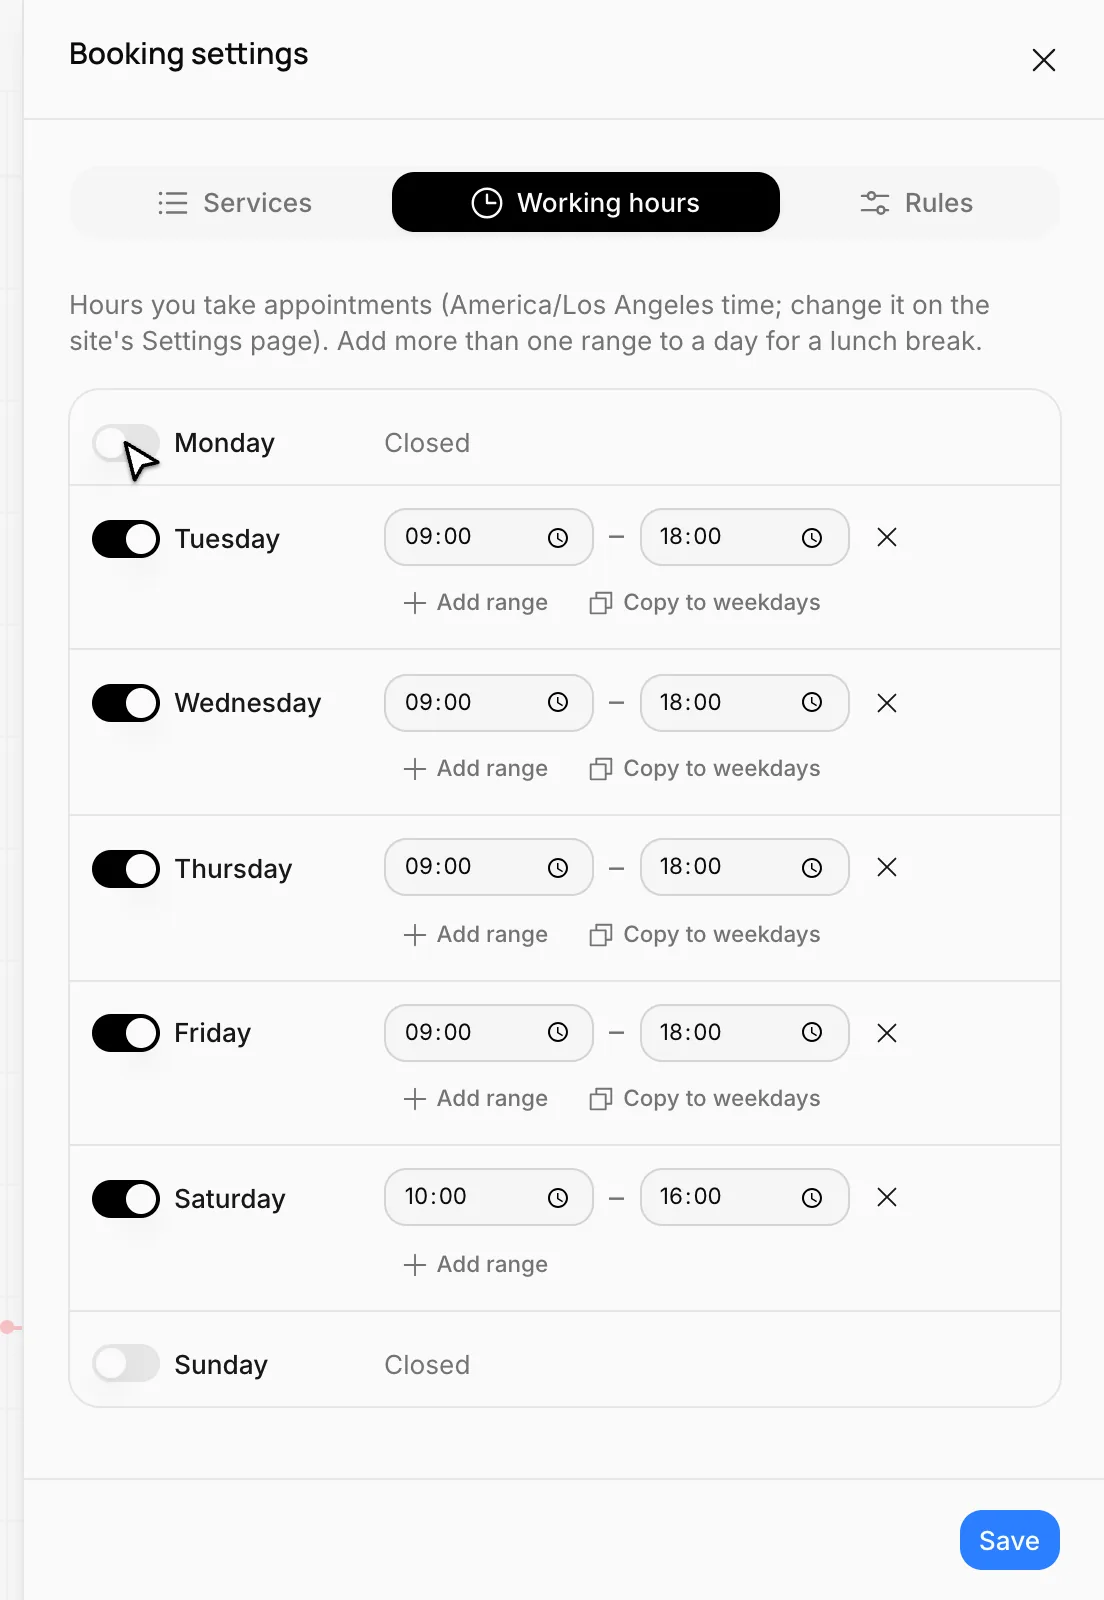
- To close a day, turn off its switch.
- For a lunch break, add a second range to that day with Add range (9:00–12:00 and 13:00–18:00, for example).
- Copy to weekdays copies a day's hours to the other weekdays.
The hours are in your site's time zone; change the time zone in Site settings.
Rules
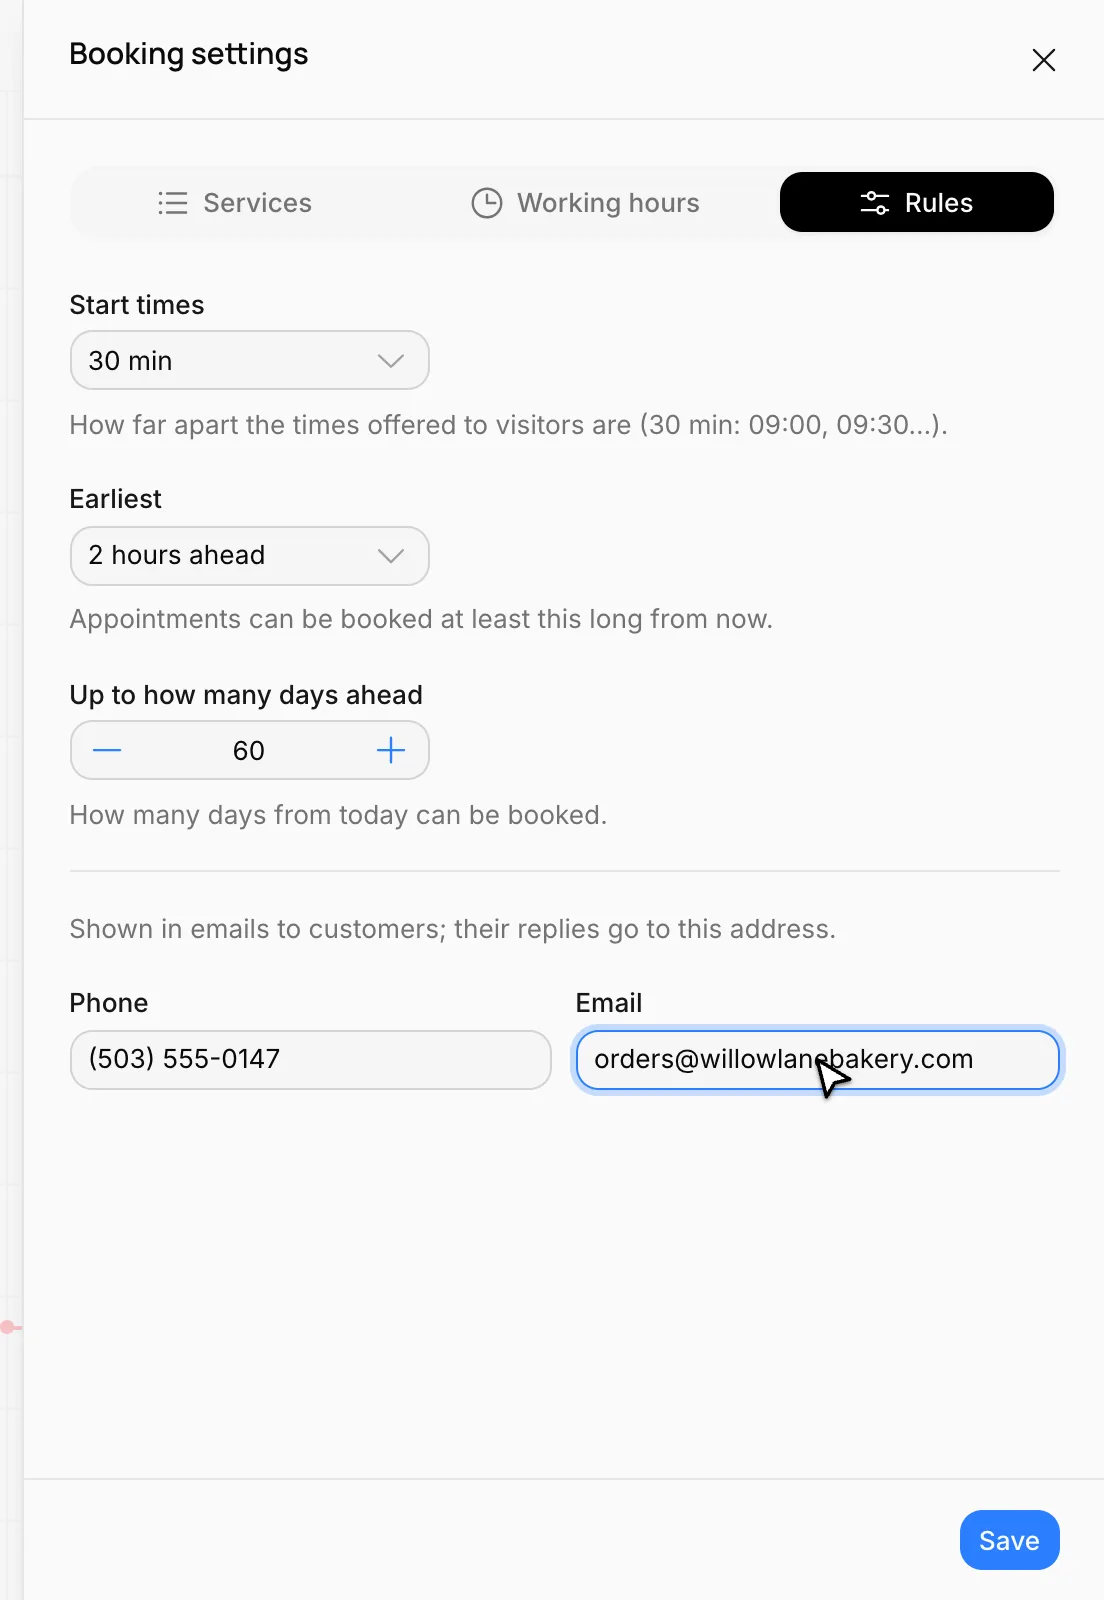
- Start times: How far apart the times offered to visitors are. With 30 minutes, 9:00, 9:30, 10:00… are shown.
- Earliest: How far ahead appointments must be booked. For example, with 2 hours ahead, nobody can book an appointment half an hour from now.
- Up to how many days ahead: How many days from today can be booked.
- Phone and Email: Shown in emails to visitors; if a visitor replies to the email, the reply goes to this address.
Settings take effect as soon as they're saved; there's no need to publish.
Add the Appointment block to your site
In the editor, open the page where you want people to book (the home page or a separate booking page) and add Add block > Contact > Appointment. Write the title and description, then press Publish.
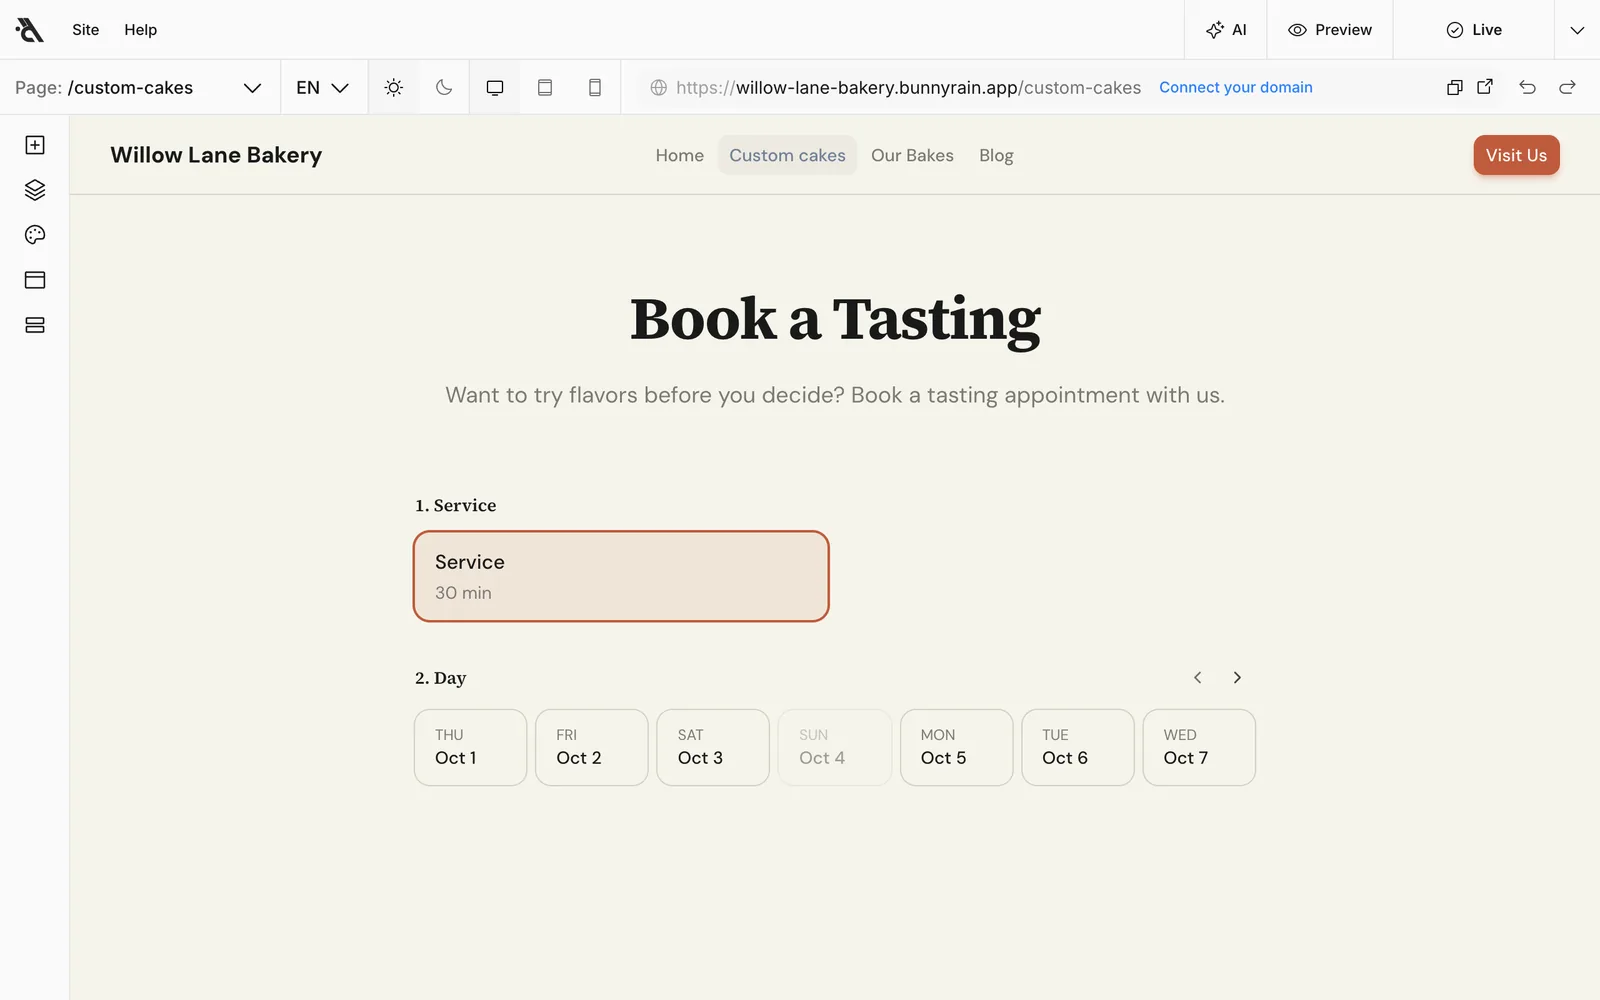
In the editor, the block shows a sample view; the real services and free times appear on the live site.
How visitors book
The visitor picks a service, a day and one of the free times, enters their name, phone and email, adds a note if they like and presses Request appointment. Closed days and taken times can't be selected.
When a request comes in:
- The visitor gets a "request received" email.
- You get a "new appointment request" email.
- The request shows in the calendar, striped yellow, as Awaiting approval, and also lands in the Inbox.
A pending request holds its time: nobody else can take that slot until you've looked at it. Even if two people pick the same time at the same moment, no double booking happens.
Confirm requests
Click the request in the calendar or in the Awaiting approval list in the left panel. The window that opens shows the service, the time, the visitor's details and note.
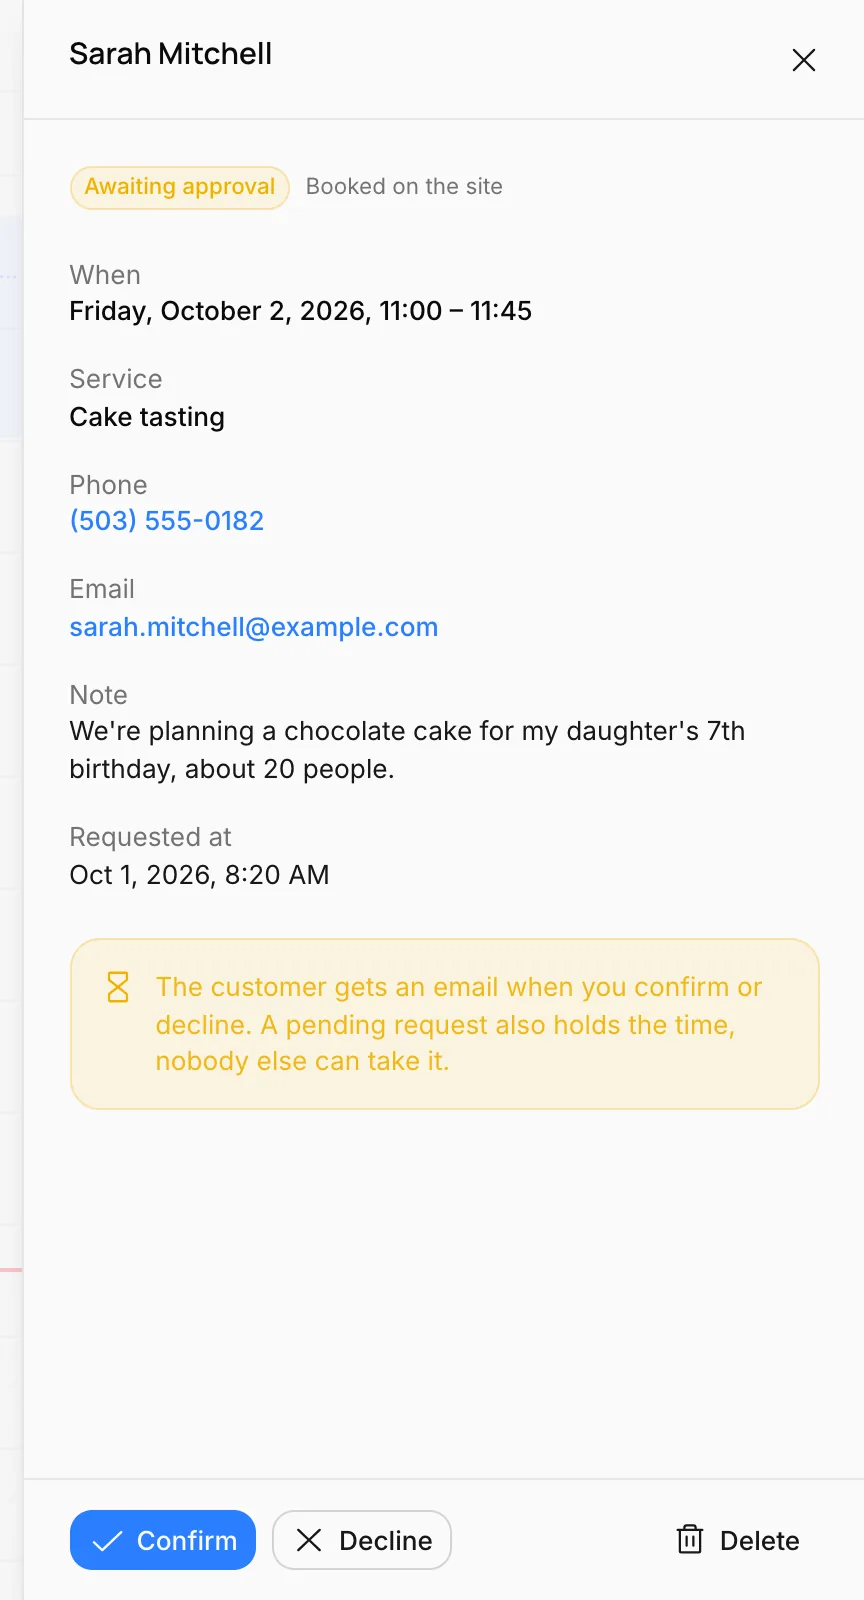
- Confirm: The appointment is confirmed and the visitor gets a confirmation email.
- Decline: The visitor gets an email saying the request couldn't be met, and the time opens up again.
You can cancel a confirmed appointment with Cancel appointment; the visitor gets a cancellation email. Delete removes the appointment permanently without emailing anyone; if you want to let the visitor know, cancel it first.
Use the calendar
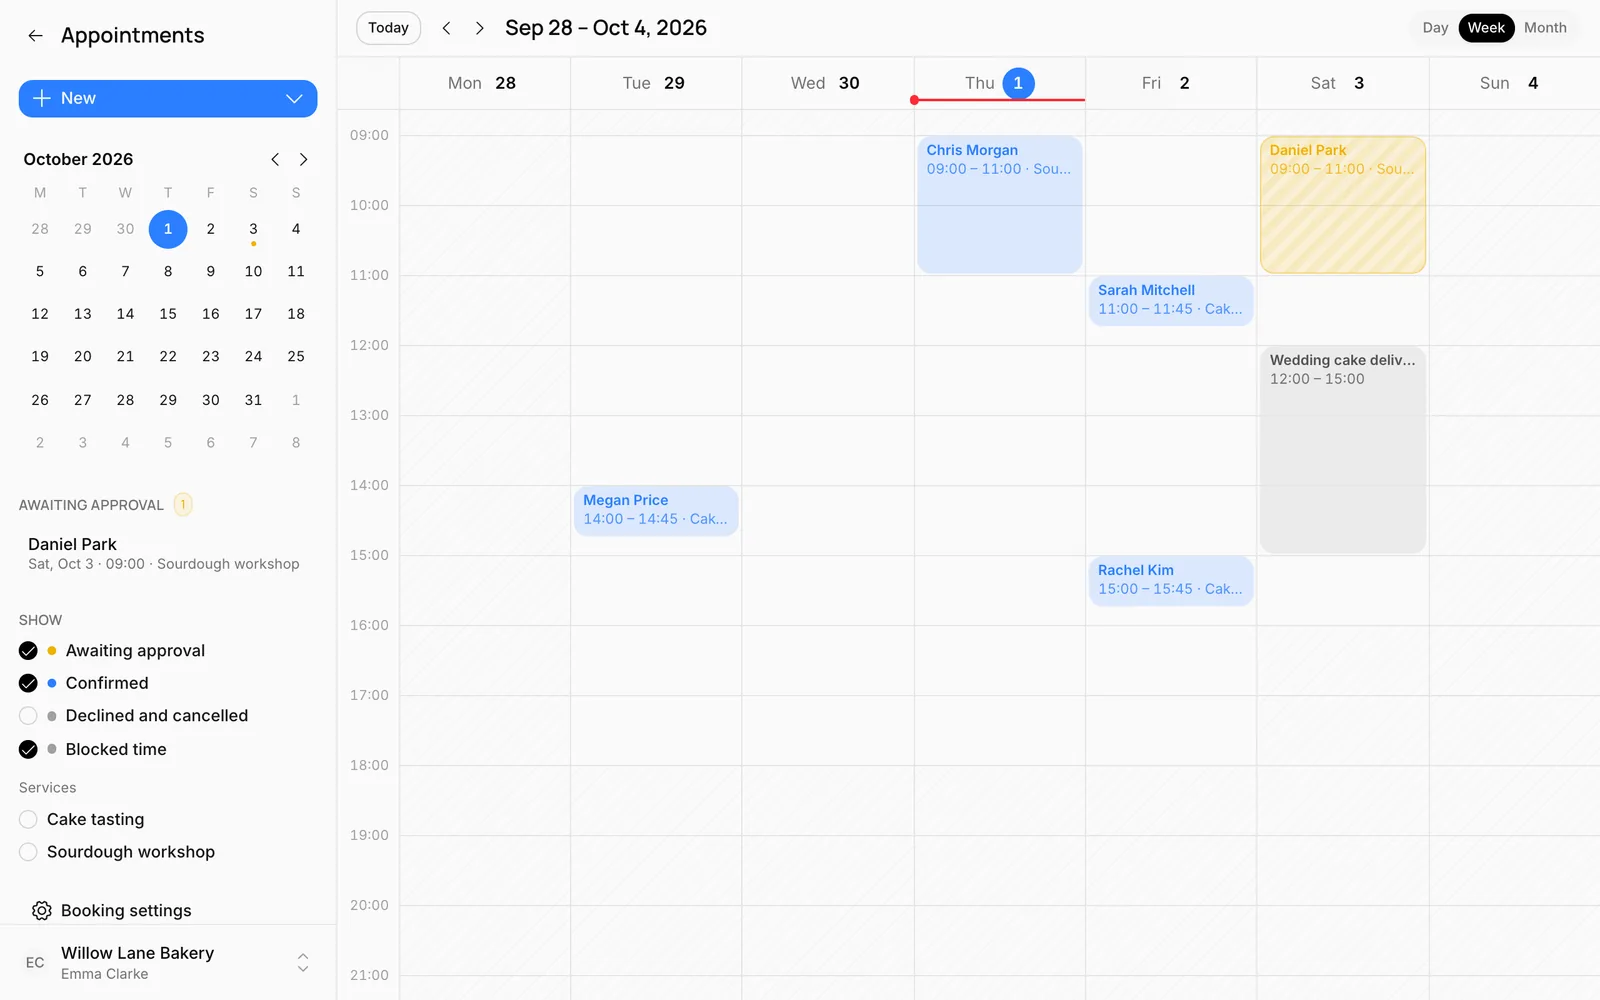
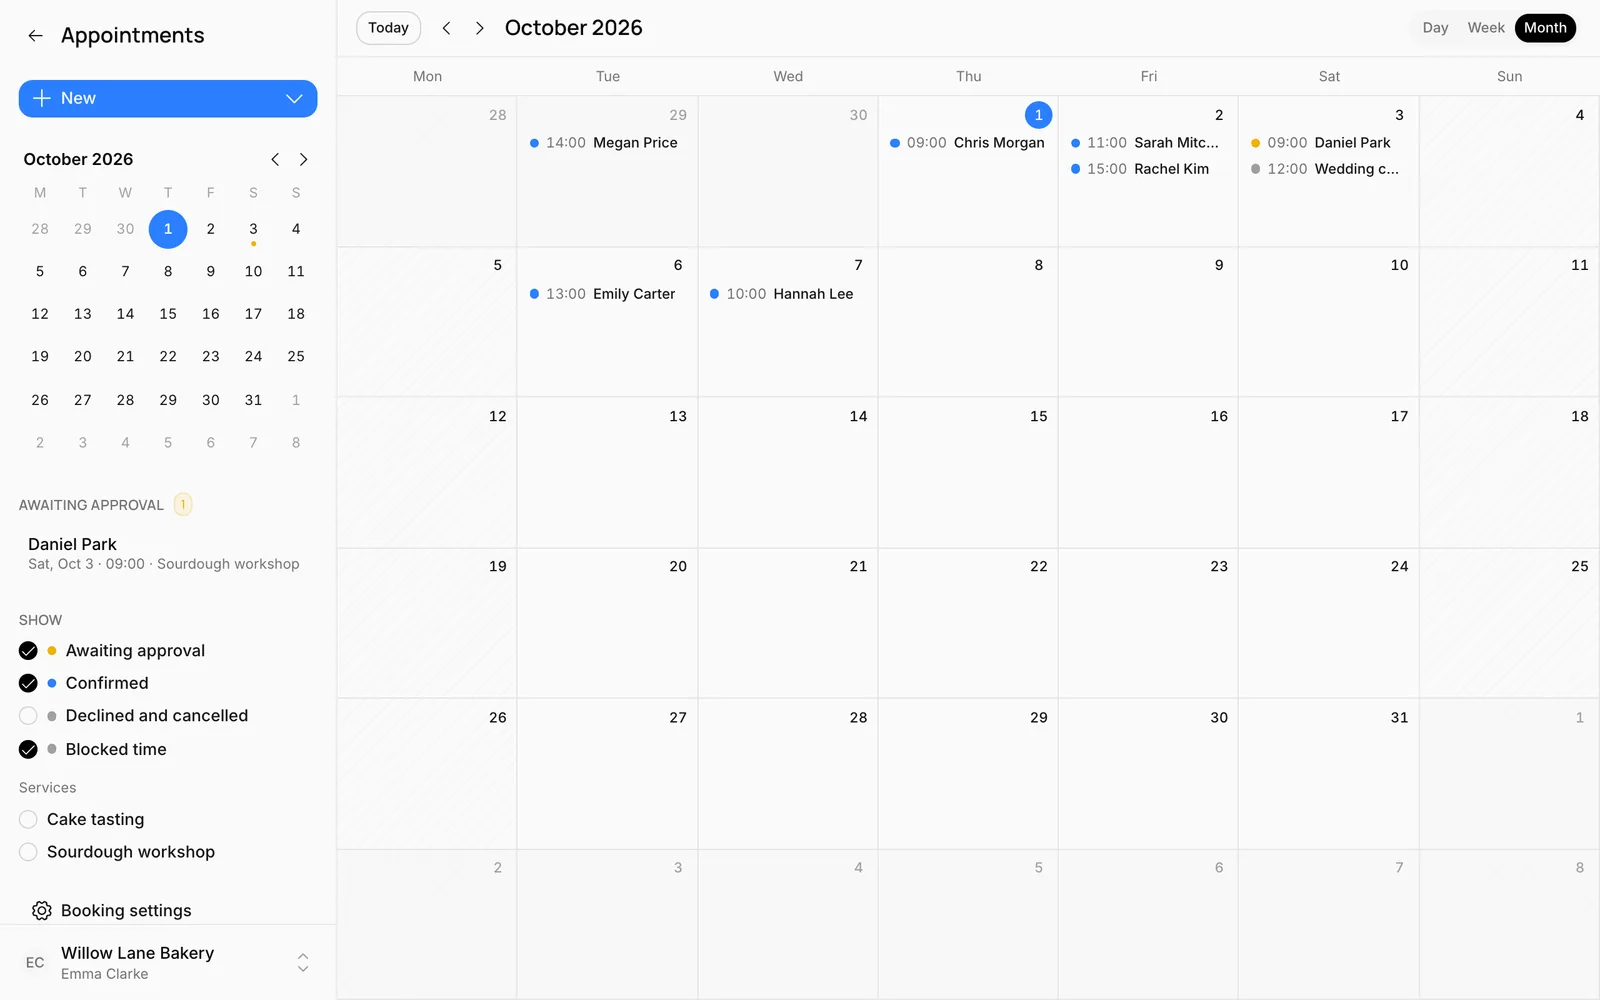
- Switch between Day, Week and Month in the top right; use the arrows to go back and forward, and Today to come back to today.
- Colors: awaiting approval is striped yellow, confirmed is colored and blocked time is gray; declined and cancelled appointments are struck through (you can show them with the filters).
- Hours outside your working hours are shaded.
- Keyboard shortcuts: T today, D day, W week, M month, arrows for previous and next.
Add appointments taken by phone
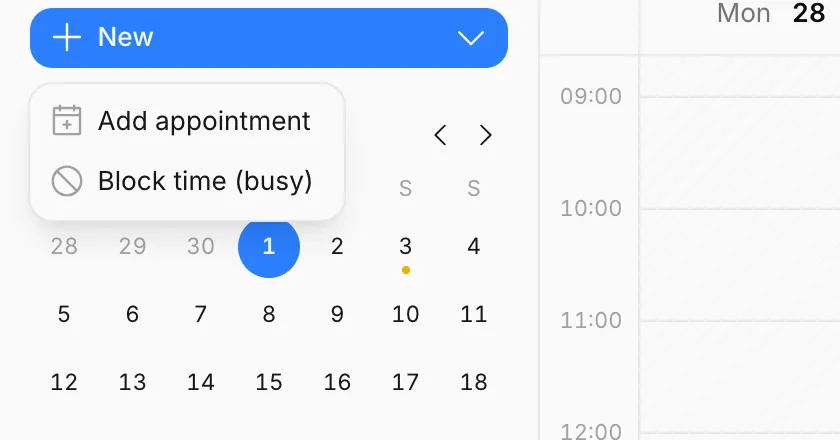
Add appointments you take by phone or in person to the calendar too, so that time doesn't show as free on your site. Choose Add appointment from the New menu in the left panel, or click a free time in the calendar.
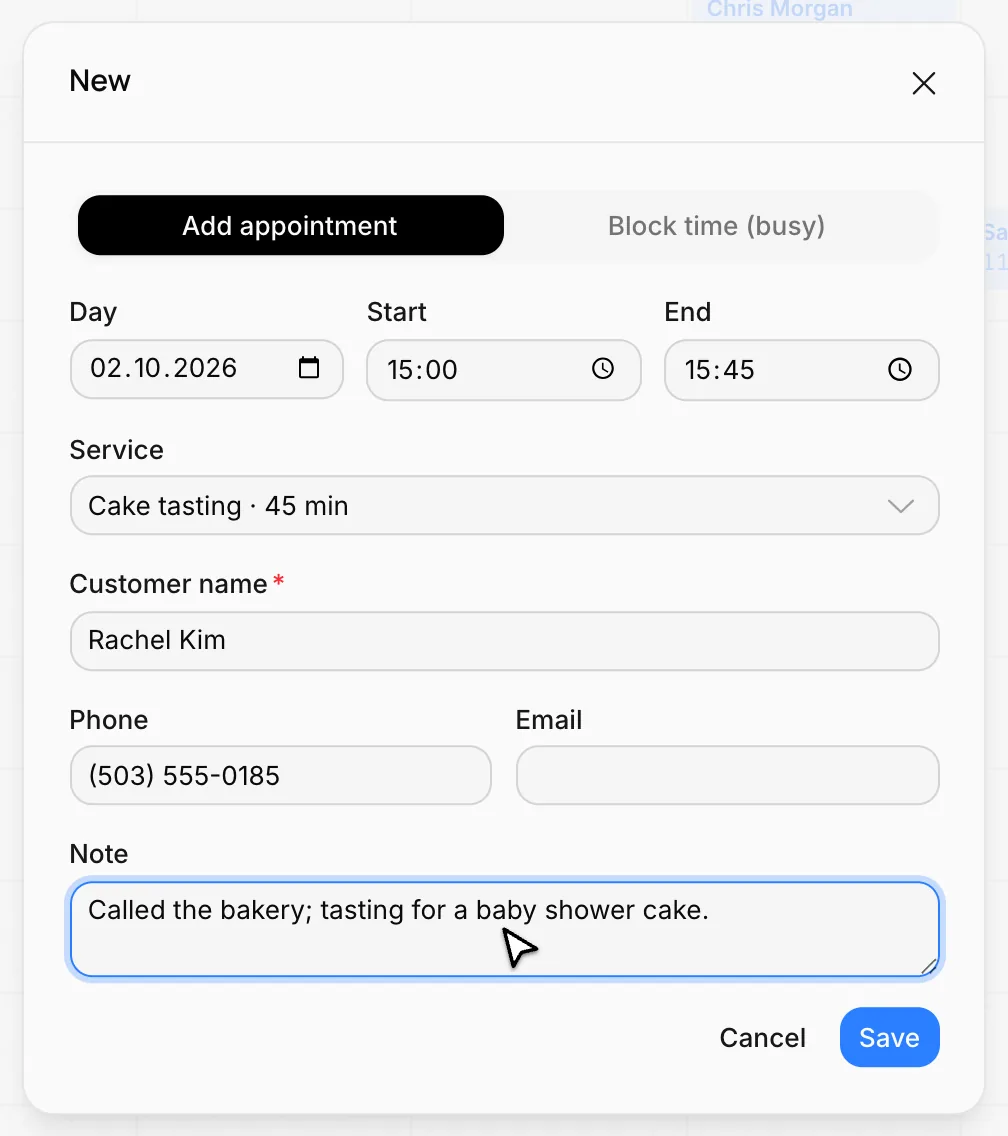
Enter the day, start and end time, the service and the customer's name. Appointments added from the dashboard are confirmed straight away, and no email is sent to the customer.
Block time
For time off, holidays, breaks or an errand, choose New > Block time (busy). Nobody can book during blocked time. There's no separate holiday setting; block those days this way.
Good to know
- Only one appointment can be booked at a time. Two staff members taking separate appointments at the same time isn't supported yet.
- Visitors don't get reminder emails, and they can't cancel their appointment themselves; they call you.
- On multilingual sites, service names are shown in the main language.
Inbox
Read contact form messages and appointment requests in one place; reply by email, use templates and let the assistant draft your reply.
Google business
Connect your business on Google Maps to your site; show your rating and reviews on the site, and bring over your address, phone, opening hours and photos in one click.